Sound Box
- Hui En Jezreel
- May 15, 2020
- 2 min read
Design
After going through the different design process, I then cut out 18 sides of wood and chamfered the edges to 45 degrees for the dominant and flushed the edges of the subdominant and subordinate. With detailed dimensions and planning I was able to make the sound box. Through this project I have learnt more on making use of the 3 elements and how sound works .

Sound Box project Sketches
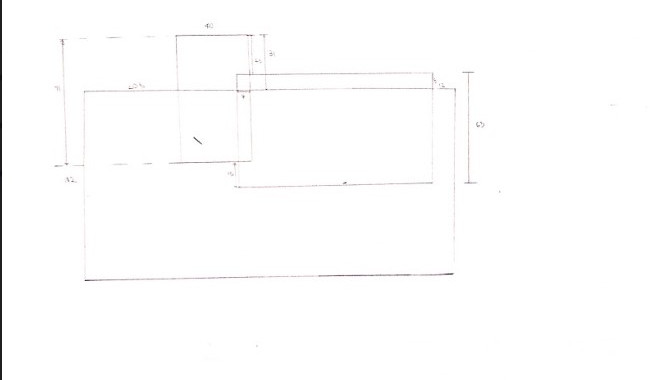
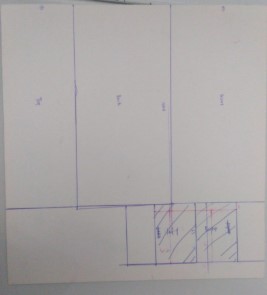
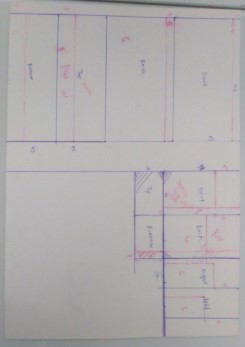
25 of 2D-sketches There should be 3 elements dominant, subdominant, subordinate. The Dominant being the largest followed by the subdominant and then subordinate. The 3 elements have to be proportional. 6 of 3D-sketches By narrowing down the 25 of 2D-sketches, I took 6 of it and implement it as one of the sides in my 3D-sketches respectively. At the beginning I had faced challenges like visualising it in different perspectives and also drawing it out proportionally. I am glad that after several trials I managed to overcome the difficulties. Final Sketches with dimensions After consultation on 6 of 3D-sketches, I finally decided to go with the shown below as my final. Then drew out the top, front, right views of it in 1:1 scale. Also ensuring that no dimensions repeat
Mockups and Prototype
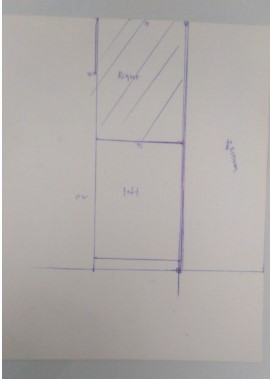
With the detail final sketches with dimensions, I started making my sound box. The subordinate was hardest to make as I had to cut 3 different pieces with dimensions so accurate that it will sit nicely on the dominant and subdominant. Mock up of channeling By taking the important dimensions, I used cardboard and masking tape to make the channeling. To ease process of Sound Box making I drew out 1:1 scale for all 6 sides of the 3 elements respectively. Hence, drew out 18 sides altogether and with detail annotation and markings on where to cut and keep. This have definitely quickened my space and allow me to finish the sound box quicker.
Portfolio


Comments